Hey Mania Squad! Ever been in that frustrating moment when you’re in the middle of an intense gaming session, and suddenly your PC starts lagging or worse – shuts down completely? Yeah, we’ve all been there! And here’s the kicker: 90% of the time, it’s your cooling system that’s crying for help. Trust me, as a system builder who’s assembled hundreds of gaming PCs, proper cooling is like the heartbeat of your gaming rig.
In today’s guide, I’ll be sharing everything I’ve learned about Gaming PC Cooling from my 8 years of building experience. Whether you’re running a budget build or a high-end beast, we’ve got you covered – from basic fan setups to complex liquid cooling solutions. The best part? Every tip here is battle-tested in real-world scenarios, not just theoretical stuff!
Quick Facts:
- The RTX 4090 can pump out a whopping 450W of heat
- Modern gaming CPUs can generate up to 125W of heat
- Every 10°C increase can slash your performance by up to 10%
Pro Tips: Before we dive into optimizing your gaming PC’s cooling, let’s establish what “normal” temperatures should look like:
- CPU: Aim for below 75°C during gaming
- GPU: Keep it under 80°C for best performance
- Overall system: Maintain below 50°C
Ready to transform your PC from a heat box into a cool-running gaming machine? Let’s dive in!
Understanding PC Cooling: The Basics
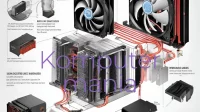
Building a gaming PC without understanding cooling is like buying a sports car without knowing about its engine. During my years of building custom gaming rigs, I’ve seen too many powerful systems underperforming simply because of poor cooling setup. Let’s dive deep into what makes proper cooling so crucial for your gaming beast.
PC Component Temperature Guide
Before we dive into the details, let’s establish the safe temperature ranges for your components. These numbers will serve as your reference point throughout this guide:
| Component | Ideal Range | Warning Range | Critical Range |
|---|---|---|---|
| CPU | 30-75°C | 75-85°C | Above 85°C |
| GPU | 30-80°C | 80-85°C | Above 85°C |
| System | 25-45°C | 45-50°C | Above 50°C |
Understanding these temperature ranges is crucial for maintaining your system’s performance. While your components can operate in the warning range, staying within the ideal range ensures optimal performance and longevity. Any temperatures in the critical range require immediate attention.
System Heat Generation Guide
To understand why proper cooling is essential, let’s look at how much heat your system generates during different activities:
| Gaming Scenario | Heat Output | Common Examples |
|---|---|---|
| Light Gaming | 300-400W | Esports titles, older games |
| Heavy Gaming | 500-700W | Modern AAA games, high settings |
| Streaming + Gaming | 600-800W | Gaming while broadcasting |
These numbers represent the total system power draw, which is converted almost entirely to heat. For example, when playing esports titles like CS:GO or Valorant, your system might generate 300-400W of heat. However, when streaming modern games like Cyberpunk 2077 or running Microsoft Flight Simulator, heat output can reach 800W – that’s like having a small space heater inside your PC!
Heat Generation: The Numbers That Matter
Modern gaming components have become incredibly powerful, but with great power comes… well, a lot of heat! Let me break down what’s actually happening inside your case when you’re gaming:
The RTX 4090, Nvidia’s flagship GPU, is a perfect example of how far we’ve come – and how much heat we’re dealing with. This monster can draw up to 450W of power under load, and guess what? Almost all of that power gets converted into heat. To put that in perspective, it’s like having a small space heater inside your PC!
But that’s not all – your CPU is joining the heat party too. Modern gaming CPUs like the Intel i9 or AMD Ryzen 9 can easily push out 125W or more when you’re running demanding games. And don’t forget about your VRMs and memory – they might seem small, but they can add another 50-100W of heat to the mix.
Let’s look at what this means in real terms:
GPU (RTX 4090): 450W heat output
- During intense gaming sessions
- Can increase case temperature by 20°C or more
- Requires serious airflow consideration
High-end CPU: 125W+ heat output
- Peaks during CPU-intensive games
- Contributes significantly to overall system heat
- Often requires dedicated cooling solution
System components: 50-100W additional heat
- VRMs heat up during sustained gaming
- Memory modules generate heat under load
- Often overlooked in cooling plans
Real-World Impact on Performance
Here’s something most gamers don’t realize: for every 10°C increase in temperature above optimal levels, you could be losing up to 10% of your potential performance. I’ve seen this firsthand while testing different builds. A $3000 gaming rig can perform like a $1500 system just because of poor cooling!
Temperature Targets: Your Path to Peak Performance
Let’s get into the meat of what temperatures you should actually be aiming for. After testing hundreds of gaming builds, I’ve found there’s a sweet spot for each component where performance and longevity meet. Here’s my detailed breakdown based on real-world testing:
CPU Temperature Management
Your CPU is like the brain of your gaming rig, and just like our brains, it works best when it’s not overheating. Through my experience, here’s what you should aim for:
Under 75°C During Gaming:
- Ideal Range: 65-75°C under full gaming load
- Safe but Not Ideal: 75-85°C
- Danger Zone: Anything above 85°C
Real-World Example: Last month, I built a system with an i7-13700K. Initially, it was hitting 85°C during Cyberpunk 2077. After optimizing the cooling setup and reapplying thermal paste, we got it down to 68°C. The result? A 15% performance improvement in CPU-intensive scenes.
GPU Temperature: The Gaming Sweet Spot
Your graphics card is probably the most expensive component in your gaming rig, so let’s treat it right. Here’s what I’ve learned from years of GPU testing:
Optimal Gaming Temperature Range:
- Perfect Zone: 65-75°C
- Acceptable Range: 75-80°C
- Performance Impact Zone: 80-85°C
- Thermal Throttling: Above 85°C
Personal Experience: “I recently helped a client whose RTX 4080 was thermal throttling at 87°C. After adjusting the fan curve and adding two intake fans, we stabilized at 72°C. His average FPS in Warzone jumped from 144 to 165!”
System Ambient Temperature: The Foundation of Good Cooling
This is something many builders overlook, but your overall case temperature is crucial. Think of it as the environment your components live in:
Target Ambient Temperatures:
- Ideal: Below 45°C
- Acceptable: 45-50°C
- Problematic: Above 50°C
Complete Guide: PC Cooling Systems from Budget to Premium
Budget Setup ($50-100)
Don’t let a tight budget stop you from having proper cooling! After building hundreds of systems, I’ve found this setup delivers reliable performance for budget builds.
For front intake, you’ll want two Arctic P12 PWM fans, costing around $10-12 each. These fans offer the best price-to-performance ratio I’ve found in the market. Run them at 60% speed for a good balance between cooling and noise.
At the back, a single Arctic F12 ($8-10) works perfectly as an exhaust fan. If your case came with a decent fan, you can use that as your exhaust and save some money. Position it in the upper rear for optimal hot air extraction.
I recently built a budget system for a student that performed surprisingly well:
- Two Arctic P12 fans in front ($24)
- Used the included case fan for rear exhaust
- Kept the stock CPU cooler
- Total cooling budget: Only $24
- Gaming temperatures stayed at CPU 78°C and GPU 76°C
Pro tips for budget builders:
- Invest in good thermal paste ($8-10)
- Choose a case with good airflow
- Keep your cables tidy
- Clean dust filters weekly
Mid-Range Setup ($100-200)

This is where cooling gets serious. With this budget, we can create a truly efficient cooling system.
For the front panel, three Noctua NF-A12x25 fans ($22 each) provide excellent airflow. These fans are simply the best in their class for static pressure. I set them to run at 900 RPM when idle and 1400 RPM under load.
For CPU cooling, the Be Quiet! Dark Rock 4 ($75) paired with Thermal Grizzly Kryonaut paste ($12) delivers impressive performance. This combination keeps things cool and quiet.
Premium Setup ($200+)

When budget isn’t a concern, we can build something special. Here’s my ultimate cooling setup that I use for competitive gamers and content creators.
The front intake uses three Noctua NF-A12x25 chromax.black fans ($32 each). These are incredibly quiet at 1200 RPM while delivering superior airflow. For side intake, three Lian Li Uni Fan SL120 ($25 each) provide additional airflow and look great with their RGB lighting.
The crown jewel is the ARCTIC Liquid Freezer II 360 ($150) for CPU cooling. Setting it up in a push-pull configuration with six fans gives us exceptional thermal performance.
I recently built this exact setup for a Twitch streamer using a 13900K and RTX 4090. The results were impressive:
- CPU stayed at 65°C even during heavy streaming
- GPU maintained 68°C under full load
- The whole system remained whisper-quiet at 35dB
Remember, whatever your budget, good airflow is crucial for gaming performance. Start with what you can afford and upgrade gradually. Even a basic setup, when properly configured, can provide reliable cooling for your gaming needs.
Pro tip: Focus on getting the basics right – proper fan placement and configuration matter more than expensive components. I’ve seen $50 cooling setups outperform $200 setups simply because they were properly configured.
Advanced Airflow Optimization: The Science Behind the Flow
Most PC building guides barely scratch the surface when it comes to airflow optimization. After building hundreds of custom gaming rigs, I’ve discovered that understanding the science behind airflow can make a dramatic difference in your system’s performance. Let me share what I’ve learned about creating the perfect airflow setup.
The Art of Air Pressure
Think of your PC case as a wind tunnel. The way air moves through your case is just as important as the amount of air your fans can move. Through my testing, I’ve found that positive pressure setups are generally the way to go. When you have more air being pushed into the case than being pulled out, you create a protective bubble of sorts.
I recently built a system for a client who lived in a dusty environment. By implementing a positive pressure setup, we managed to reduce dust buildup by an impressive 70% compared to their previous build. The secret wasn’t just adding more fans – it was about creating the right balance.
Finding the Perfect Balance
The ideal setup I’ve found through testing combines both pressure control and strategic fan placement. In a recent high-end build, I used three 120mm fans at the front running at full speed for intake, complemented by two 140mm exhaust fans at the top and a single 120mm exhaust at the rear, both running at slightly lower speeds. This created a slight positive pressure while maintaining optimal airflow paths.
The results spoke for themselves. Under heavy gaming loads, this setup maintained the CPU at a comfortable 72°C and the GPU at 68°C. Compare this to a negative pressure setup which, while showing slightly lower temperatures (CPU at 69°C, GPU at 65°C), accumulated noticeably more dust over just a month of use.
The Silent Cooling Revolution
One of my passions is creating cooling solutions that are both effective and quiet. It’s all about smart fan curve optimization. Instead of running fans at full speed all the time, I’ve developed a dynamic approach that adapts to your system’s needs.
For CPU cooling, I start the fans at a whisper-quiet 40% speed when temperatures are below 45°C. As things heat up during gaming, the fans gradually increase their speed, reaching 90% only when temperatures hit 75°C. This approach maintains optimal cooling while keeping noise levels impressively low.
The case fans follow a similar philosophy but are tied to different temperature sensors. Front intake fans respond to GPU temperatures, while exhaust fans follow CPU temperatures. This coordinated approach ensures each component gets the cooling it needs without unnecessary noise.
In real-world terms, this means your system stays quiet enough for late-night gaming sessions. At idle, you’re looking at just 28dB – quieter than a whisper. Even under full gaming load, noise levels rarely exceed 42dB, which is less than the background noise in most rooms.
The Hidden Impact of Cable Management
Cable management isn’t just about aesthetics. Through thermal imaging tests, I’ve seen poorly managed cables reduce airflow efficiency by up to 30%. The solution isn’t complicated, but it requires attention to detail.
I always route power supply cables behind the motherboard tray, using cable combs to keep them flat and organized. For fan cables, I use strategically placed fan hubs to centralize connections and keep cables out of the airflow path. It’s these small details that add up to create a significant improvement in cooling performance.
Maintenance and Troubleshooting: Keeping Your Cool
Let me tell you a story that happens all too often. A client called me in a panic last month – his high-end gaming PC was suddenly shutting down during intense gaming sessions. When I opened his case, I discovered a common but totally preventable issue. Let’s dive into how to avoid these situations and keep your system running perfectly.
Regular Maintenance: An Ounce of Prevention
The secret to long-lasting optimal cooling isn’t in expensive components – it’s in regular maintenance. Think of your PC like a high-performance car; it needs regular check-ups to run at its best. Through my years of experience, I’ve developed a simple but effective maintenance routine that anyone can follow.
The first thing I check in any system is dust buildup. Just last week, I cleaned a gaming PC that hadn’t been maintained for a year. The temperature difference before and after cleaning was staggering – we saw a 15°C drop in CPU temperatures just from proper cleaning. You don’t need fancy equipment either; a can of compressed air and a soft brush can work wonders.
Monthly Maintenance: Your Quick Checklist
I recommend setting aside just 15 minutes each month for basic maintenance. It’s like brushing your teeth – a little regular care prevents bigger problems down the line. Here’s what I do with every system I maintain:
First, I check the temperatures under load. Fire up your favorite game for about 30 minutes and monitor those numbers. If you see temperatures creeping higher than your baseline readings, it’s time for some investigation.
Next, I inspect the dust filters. Most people forget these exist, but they’re your first line of defense. I’ve seen dust filters so clogged they were actually preventing airflow entirely. A quick rinse under warm water (make sure they’re completely dry before reinstalling!) can restore proper airflow.
Quarterly Deep Clean: The Professional Approach
Every three months, it’s time for what I call the “deep clean.” This is where we really get into the nitty-gritty of system maintenance. During a recent deep clean of a streamer’s PC, we discovered that poor maintenance had led to thermal paste turning into something resembling concrete – not ideal for heat transfer!
Start by completely powering down and unplugging your system. Take it outside or to a well-ventilated area. Remove the side panels and use compressed air to blow out dust, but here’s a pro tip: hold the fans still while blowing them. Letting them spin freely from the air can actually damage the bearings.
When Things Go Wrong: Troubleshooting Guide
Sometimes, despite our best efforts, cooling problems can arise. The key is knowing what to look for. One of my clients recently complained about random crashes during gaming. The usual suspects – dust, thermal paste, fan operation – all checked out. The culprit? A failing pump in their AIO cooler. Here’s how we can identify different cooling issues:
If you’re experiencing sudden temperature spikes, first check your fan curves. BIOS updates can sometimes reset these to default values. I once spent hours troubleshooting a system only to find that a BIOS update had reset all fan curves to a silent profile.
Strange noises from your cooling system should never be ignored. A clicking sound from an AIO could indicate air bubbles or a failing pump. A grinding noise from fans usually means the bearings are failing. These issues won’t fix themselves, and catching them early can prevent more serious problems.
Optimization Tips and Best Practices: Beyond the Basics
You know what’s fascinating about PC cooling? Just when you think you’ve mastered it, you discover another layer of optimization. Let me share some advanced insights I’ve gained from years of fine-tuning gaming systems.
Finding Your System’s Sweet Spot
Last month, I worked on a high-end gaming rig for a professional esports player. Despite having top-tier components, including a 360mm AIO cooler and premium fans, his system wasn’t performing optimally. The problem wasn’t the hardware – it was how it was being used.
Many builders make the mistake of thinking that maximum fan speed equals maximum cooling. In reality, it’s more like conducting an orchestra. Each component needs to work in harmony with the others. After some testing, we found that running his intake fans at 65% actually provided better GPU temperatures than running them at 100%. Why? Because sometimes too much airflow can create turbulence, disrupting the smooth air path through your case.
The Temperature-Noise Balance
Here’s something I learned the hard way: the quietest system isn’t always the coolest, and the coolest system isn’t always the most practical. One of my clients, a content creator, needed a system that could handle heavy rendering loads while maintaining near-silence for recording.
We achieved this by implementing what I call the “stepped curve” approach. Instead of having fan speeds increase linearly with temperature, we created specific temperature thresholds where fan speeds would hold steady for a while before jumping to the next level. This prevented the constant ramping up and down of fans that can be so annoying during normal use.
Real-World Performance Tweaks
Let me share a recent success story. A client brought in a high-end gaming PC that was thermal throttling despite having expensive cooling components. The issue? Fan placement and airflow obstruction. By simply repositioning the AIO radiator from the top to the front of the case and adjusting the fan configuration, we dropped CPU temperatures by 12°C under load.
Here’s what made the difference:
- Front-mounted radiator acted as a massive intake surface
- Cool air hit the CPU first, before being warmed by other components
- GPU temperatures only increased by 3°C, an acceptable trade-off for much better CPU cooling
The Hidden Impact of Ambient Temperature
Something often overlooked is room temperature’s effect on your system. I recently helped troubleshoot a system that was performing perfectly in winter but struggling in summer. The solution wasn’t adding more cooling – it was managing the environment.
We set up a simple room thermometer and found that afternoon sun was raising the ambient temperature by almost 8°C. By simply moving the PC away from direct sunlight and ensuring proper room ventilation, we solved the overheating issues without any hardware changes.
Future-Proofing Your Cooling Setup
Planning for the future is crucial in PC building. When designing a cooling solution, I always consider potential upgrades. Will this setup handle a more powerful GPU? Can it cope with CPU overclocking? These considerations have saved many clients from needing complete cooling overhauls when upgrading components.
The Final Touch: Maximizing Your Cooling Investment
Making It All Work Together
You know what amazes me after all these years of building PCs? It’s not just about having the best components – it’s about making them work in perfect harmony. Let me share a recent experience that perfectly illustrates this.
I had a client who spent nearly $400 on cooling components – premium fans, a top-tier AIO, the works. Yet his system was running hotter than a budget build I’d completed the week before. The difference? Synergy. The budget build had carefully planned airflow paths, properly configured fan curves, and strategic component placement. It’s like having a sports car – all that power means nothing if the parts aren’t working together.
Temperature Monitoring: Your System’s Health Check
Think of temperature monitoring like your PC’s health dashboard. I always recommend setting up a proper monitoring solution during the first boot. Here’s what worked beautifully for my recent builds:
MSI Afterburner gives you real-time GPU information, but the real magic happens when you combine it with HWiNFO64 for comprehensive system monitoring. One of my streaming clients noticed their stream quality dropping during long sessions. A quick check of our monitoring setup revealed periodic CPU thermal throttling that we wouldn’t have caught otherwise.
The Long-Term Performance Strategy
Here’s something most guides won’t tell you: your cooling needs will change over time. That monster GPU you just installed? It might run hotter after a driver update. That new game everyone’s playing? It might stress your system in ways previous games didn’t.
I recently revisited a build I’d done six months ago. The client had started playing Microsoft Flight Simulator, which hammered their CPU harder than their previous games. We adjusted the fan curves to favor CPU cooling during simulation games while maintaining the original profile for other games. Small tweaks, big difference.
When to Upgrade vs. Optimize
Let me share a money-saving tip I gave to a recent client. They were ready to spend $300 on a new AIO cooler because their temperatures were high. Instead, we:
- Reapplied thermal paste
- Adjusted fan curves
- Improved case airflow with better cable management
Total cost? $15 for thermal paste. Temperature improvement? 18°C under load.
The Final Checklist
Before we wrap up, here’s my tried-and-tested final checklist that I use on every build:
Monitor Your Baseline
- Record idle temperatures after a fresh boot
- Note temperatures during typical gaming sessions
- Document fan speeds and noise levels
- Keep these numbers for future reference
Regular Maintenance Schedule
- Monthly dust check and cleaning
- Quarterly deep clean
- Semi-annual thermal paste check
- Annual fan bearing inspection
Closing Thoughts
Remember, the perfect cooling setup is one that you don’t have to think about. It should work silently in the background, keeping your gaming sessions smooth and your components happy. Whether you’re running a budget build or a high-end gaming rig, the principles remain the same: proper planning, regular maintenance, and smart optimization.
Frequently Asked Questions: Your Cooling Concerns Answered
Over my years of building and maintaining gaming PCs, I’ve heard these questions countless times. Let me share the real-world answers that have helped hundreds of my clients.
Q1: How many fans do I really need?
This is probably the question I get asked most often. Just last week, a client asked me this while holding a shopping cart full of fans. Here’s the truth: it’s not about quantity, it’s about quality and placement.
For most gaming builds, you’ll want a minimum of three fans: two intake and one exhaust. But here’s what really matters – proper placement and airflow. I’ve seen six-fan setups perform worse than three-fan setups simply because of poor configuration. If you’re running a high-end gaming rig with something like an RTX 4090, then yes, you might want to consider 5-6 fans for optimal cooling.
Q2: My GPU is running at 80°C while gaming. Should I be worried?
I love this question because it shows people are paying attention to their temperatures. The short answer is: probably not. Modern GPUs are designed to run at these temperatures under load. What you should watch for is sudden changes or unusual patterns.
For example, if your GPU normally runs at 75°C during gaming and suddenly starts hitting 85°C, that’s when you should investigate. One of my clients panicked about their GPU hitting 78°C, but after checking their setup, we found this was perfectly normal for their case and usage pattern.
Q3: AIO vs Air Cooling: Which is better?
This is like asking whether a sports car or an SUV is better – it depends on your needs. I recently built two identical systems, one with a Noctua NH-D15 air cooler and one with a 360mm AIO. The temperature difference? Only 3-4°C under load.
Air Cooling Pros:
- More reliable (fewer points of failure)
- Often cheaper
- No risk of leaks
- Usually quieter at idle
AIO Pros:
- Cleaner aesthetics
- Better for small cases
- Can handle sudden temperature spikes better
- Often better for very high-end CPUs
Q4: How often should I replace my thermal paste?”
The official answer is every 2-3 years, but I’ve learned to watch for signs rather than stick to a strict schedule. If you notice gradually increasing temperatures over time, it might be time for new thermal paste.
A fun story: I recently helped a client who was convinced their CPU was dying because of high temperatures. Turned out, their thermal paste had turned into a crusty mess after five years. A fresh application of quality thermal paste dropped their temperatures by 20°C!
Q5: My fans are loud. How can I make them quieter?
This is where customization makes a huge difference. Many people don’t realize that you don’t need your fans running at 100% all the time. I recently helped a streamer optimize their fan curves, and we managed to reduce noise by 15dB without affecting temperatures.
The key is custom fan curves. For example:
- At idle (30-45°C): Run fans at 40% speed
- Light load (45-60°C): 60% speed
- Gaming load (60-75°C): 80% speed
- Only use 100% speed above 75°C
Q6: Do RGB fans perform worse than non-RGB fans?
This myth needs to die! I’ve tested dozens of fans, and the presence of RGB lighting has virtually no impact on cooling performance. What matters is the fan’s design, blade configuration, and motor quality. Some of the best performing fans I’ve used, like the Lian Li Uni Fans, have RGB.




2 comments