Are you ready to embark on an exciting journey into the world of custom-built PCs? Building your first computer might seem daunting, but with this comprehensive guide, you’ll be assembling your dream machine in no time. This step-by-step tutorial will walk you through the entire process of PC building, from selecting components to powering on your very own custom rig.
Why Build Your Own PC?
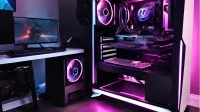
Before we dive into the nitty-gritty of computer assembly, let’s explore why building your own PC is a rewarding experience:
- Customization: Tailor your system to your exact needs and preferences.
- Cost-efficiency: Often cheaper than buying pre-built systems with similar specs.
- Learning experience: Gain valuable knowledge about computer hardware.
- Upgrade flexibility: Easily swap out components as technology advances.
Myth-busting: Common Misconceptions About PC Building
Let’s address some common myths about building a PC:
- Myth: It’s too complicated for beginners.
- Reality: With proper guidance, anyone can build a PC.
- Myth: You need specialized tools.
- Reality: A simple screwdriver is often all you need.
- Myth: It’s more expensive than buying pre-built.
- Reality: Building your own PC can often save you money.
Choosing Your Components
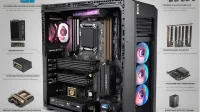
The first step in your PC building journey is selecting compatible components. Here’s a checklist of what you’ll need:
- CPU (Central Processing Unit)
- Motherboard
- RAM (Random Access Memory)
- Storage (SSD and/or HDD)
- GPU (Graphics Processing Unit)
- Power Supply Unit (PSU)
- Case
- CPU Cooler
Component Selection Tips
- Use PCPartPicker to ensure compatibility between components.
- Consider your budget and usage needs (e.g., gaming, video editing, office work).
- Read reviews and compare benchmarks on sites like UserBenchmark or PassMark.
Budget Considerations
Here’s a rough guide for different budget ranges:
- Entry-level: $500-$700
- Mid-range: $800-$1200
- High-end: $1300+
Budget Considerations
When planning your PC build, it’s important to consider your budget and what components you can afford. Here’s a detailed breakdown of what you can expect at different price points:
| Budget Level | Price Range | Components | Suitable For |
|---|---|---|---|
| Entry-level | $500-$700 |
| Basic office work, light gaming |
| Mid-range | $800-$1200 |
| 1080p gaming, content creation |
| High-end | $1300+ |
| 4K gaming, professional video editing, 3D rendering |
Remember, these are general guidelines and prices may vary depending on current market conditions and specific component choices. You can always start with a more modest build and upgrade components over time as your needs and budget allow.
When selecting components, always check for compatibility and consider future upgrade paths. For example, choosing a motherboard with extra RAM slots or PCIe lanes can make future upgrades easier and more cost-effective.
This breakdown gives you an idea of what to expect at different price points. Remember, you can always upgrade components later as your needs and budget change.
If you want to build a gaming PC, read our next article about how to build a personal gaming PC.
Safety First: Anti-Static Precautions
Before we start the assembly process, it’s crucial to understand the importance of anti-static precautions:
- Work on a non-conductive surface
- Ground yourself by touching a metal object or using an anti-static wrist strap
- Handle components by their edges, avoiding contact with circuits
These steps protect your sensitive computer hardware from static electricity damage.
Step-by-Step Assembly Guide
Now, let’s dive into the exciting part – assembling your PC!
1. Prepare Your Workspace
- Clear a large, well-lit area
- Gather all your components and a Phillips head screwdriver
- Keep your component manuals handy for reference
2. Install the CPU
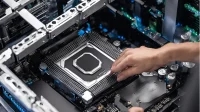
- Locate the CPU socket on the motherboard
- Carefully align the CPU with the socket (look for the golden triangle)
- Gently lower the CPU into place – never force it!
- Secure the CPU with the retention arm
3. Mount the CPU Cooler
- Apply a pea-sized dot of thermal paste to the center of the CPU (if not pre-applied)
- Align the cooler with the mounting brackets
- Secure the cooler following the manufacturer’s instructions
4. Install RAM
- Locate the DIMM slots on the motherboard
- Align the notches on the RAM with the slots
- Press firmly until you hear a click
5. Mount the Motherboard
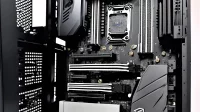
- Install standoffs in the case if not pre-installed
- Place the I/O shield in the case’s rear opening
- Carefully lower the motherboard onto the standoffs
- Secure the motherboard with screws
6. Install Storage Drives
- Locate the drive bays or slots in your case
- For 2.5″ SSDs or 3.5″ HDDs, secure them in the appropriate bays
- For M.2 SSDs, locate the slot on the motherboard and carefully insert at a 30-degree angle
7. Install the Power Supply
- Position the PSU in the designated area of the case
- Secure it with the provided screws
- Connect the 24-pin ATX and 8-pin CPU power connectors to the motherboard
8. Install the Graphics Card
- Locate the PCIe x16 slot on the motherboard
- Remove the corresponding expansion slot covers from the case
- Carefully insert the GPU into the PCIe slot
- Secure the GPU to the case with screws
- Connect any necessary power cables from the PSU to the GPU
9. Connect Case Fans and Front Panel Connectors
- Install case fans in your desired configuration
- Connect fan cables to the appropriate headers on the motherboard
- Connect front panel connectors (power switch, reset switch, LED indicators) to the motherboard
10. Cable Management
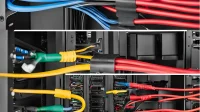
- Route cables behind the motherboard tray when possible
- Use zip ties or velcro straps to bundle cables neatly
- Ensure cables don’t obstruct fans or other components
First Boot and Troubleshooting
Congratulations! You’ve assembled your PC. Now it’s time for the moment of truth:
- Double-check all connections
- Plug in the power cable and connect a monitor
- Press the power button
If your PC doesn’t start, don’t panic. Here are some common troubleshooting steps:
- Verify that the power supply switch is on
- Reseat the RAM
- Check that all power connectors are fully inserted
- Ensure the CPU cooler is properly connected
Software Installation and Optimization
Once your PC is up and running:
- Install your operating system
- Update all drivers
- Install essential software
- Run benchmarks to ensure everything is performing as expected
Performance Optimization Tips
- Enable XMP profiles for your RAM in BIOS
- Consider overclocking your CPU and GPU for additional performance
- Monitor temperatures and adjust fan curves for optimal cooling
Upgrade Paths and Future-Proofing
One of the best things about building your own PC is the ability to upgrade over time. Consider these future upgrade paths:
- Adding more RAM
- Upgrading to a faster SSD
- Replacing the GPU for better gaming performance
- Upgrading the CPU (may require a new motherboard)
Conclusion: Your PC Building Journey
Building your first PC is an incredibly rewarding experience. Not only do you end up with a custom-built machine tailored to your needs, but you also gain valuable knowledge about computer hardware and troubleshooting.
Remember, the PC building community is vast and always willing to help. Don’t hesitate to seek advice on forums or subreddits like r/buildapc if you encounter any issues.
Now that you’ve completed this guide, we’d love to hear about your PC building experience! Did you encounter any challenges? What specs did you choose for your build? Share your story in the comments below and help inspire other budding PC builders!
Happy building, and enjoy your new custom PC!


1 comment